Why Is Water Pressure Low in Kitchen Sink: Expert Solutions & Troubleshooting Guide
Standing at your kitchen sink waiting for a pot to fill while water trickles out at an agonizing pace is one of modern life's most frustrating experiences. Whether you're trying to rinse dishes efficiently or complete basic food preparation tasks, low water pressure in your kitchen sink disrupts daily routines and wastes precious time.
When water pressure is low in kitchen sink fixtures, the underlying causes typically fall into predictable categories that homeowners can systematically diagnose and often resolve themselves. From simple mineral buildup in aerators to more complex supply line blockages, understanding the root cause determines whether you're dealing with a five-minute fix or a situation requiring professional intervention. This comprehensive troubleshooting guide will help you identify the problem and restore strong water flow to your kitchen.
Understanding Low Kitchen Sink Water Pressure
Low pressure in kitchen sinks manifests as weak water flow that makes routine tasks frustratingly slow and inefficient. Unlike other plumbing fixtures, kitchen faucets endure constant daily use, making them particularly susceptible to the mineral deposits, debris accumulation, and component wear that gradually reduce water pressure over time. Understanding how water reaches your faucet is the first step in diagnosing pressure problems.
The kitchen sink's plumbing system consists of several critical components working together to deliver adequate pressure and flow. Water travels from your municipal water supply or well through your home's plumbing system, passing through shut-off valve controls, supply lines, the faucet cartridge mechanism, and finally through the aerator before reaching your sink. Any obstruction or malfunction along this path can significantly impact the final water pressure you experience at the faucet.
Most kitchen sink pressure problems fall into two categories: localized issues affecting only the kitchen faucet, or widespread problems impacting multiple fixtures throughout your house. If other sinks, showers, and water-using appliances maintain normal pressure while only your kitchen sink struggles, the culprit likely resides in components specific to that fixture. However, when pressure drops uniformly across all fixtures, the problem probably involves your home's broader plumbing system or municipal water supply.
Understanding this distinction guides your diagnostic approach and helps determine whether you're facing a simple DIY repair or a more complex issue requiring professional attention. The majority of kitchen-specific pressure problems stem from clogged aerators, faulty cartridges, or blocked supply lines - issues that motivated homeowners can often address successfully with basic tools and a methodical approach.
Clogged Aerator: The Primary Culprit
The aerator represents the most frequent cause of low water pressure in kitchen sinks, making it the logical starting point for any troubleshooting effort. This small mesh screen device screws onto your faucet's tip and controls water flow while preventing splashing. Unfortunately, its design makes it exceptionally vulnerable to mineral deposits and debris that gradually restrict water flow over time.
Hard water areas experience particularly severe aerator clogging due to high concentrations of dissolved minerals like calcium and magnesium. As water passes through the aerator's tiny openings, these minerals precipitate out and accumulate on the mesh screen, progressively blocking the pathways water must follow to exit your faucet. Even in areas with relatively soft water, sediment and other particles can cause similar blockages over time, especially in homes with older plumbing systems.
Identifying a clogged aerator as the source of your pressure problems is straightforward. If water pressure is low only at your kitchen sink while other faucets throughout your house maintain normal flow, and if you notice irregular or uneven water stream patterns, a blocked aerator is likely the culprit. You might also observe mineral deposits or discoloration around the aerator itself, or notice that the water spray pattern has become distorted or uneven.
Cleaning a clogged aerator requires minimal tools and expertise, making it an ideal DIY repair. Start by shutting off the water supply to prevent accidental flooding, then carefully unscrew the aerator from the faucet tip. Most aerators turn counterclockwise for removal, though some models may have different mechanisms. If the aerator resists manual removal, wrap slip-joint pliers with cloth to prevent scratching the finish and provide additional leverage for turning.
Once removed, inspect the aerator for obvious debris or mineral buildup. Initial cleaning involves scrubbing with an old toothbrush and running water to dislodge loose particles. For more thorough cleaning, particularly when dealing with stubborn mineral deposits, soak the aerator in white vinegar overnight. The acetic acid in vinegar effectively dissolves calcium and lime scale that mechanical scrubbing alone cannot remove, restoring the aerator to nearly new condition.
After soaking, scrub the aerator again with your toothbrush to remove loosened deposits, rinse thoroughly with clean water, and screw it back onto your faucet. Turn the water back on and test whether pressure has been restored. If cleaning fails to improve flow significantly, the aerator may be damaged beyond repair and require replacement. Fortunately, replacement aerators cost only a few dollars and are widely available at hardware stores, making this one of the most cost-effective plumbing fixes available.

Faulty Faucet Cartridge Problems
The faucet cartridge serves as the internal mechanism that controls water flow and temperature in your kitchen sink. This component, typically located beneath the faucet handle, contains passages and valves through which water must flow before reaching the aerator. When sediment buildup or mineral deposits obstruct these internal pathways, water pressure drops noticeably even if the aerator remains clean and functional.
Cartridge-related pressure problems often develop gradually as debris accumulates within the component's internal chambers. Unlike aerator clogs that homeowners can easily observe and clean, cartridge blockages require more invasive investigation and repair. The cartridge controls water flow before it reaches the faucet's visible components, meaning obstruction at this level affects pressure regardless of aerator condition.
Several symptoms indicate that a clogged cartridge might be causing your low pressure issues. If cleaning the aerator fails to restore normal flow, if you experience pressure problems with both hot and cold water, or if the faucet handle feels increasingly difficult to operate, cartridge problems warrant investigation. Some homeowners also notice that water pressure varies inconsistently as they adjust the faucet handle position, which often indicates internal cartridge wear or blockage.
Accessing and inspecting the cartridge requires shutting off water supply lines under the sink and partially disassembling the faucet. This process varies significantly depending on your faucet's manufacturer and model, making it more complex than simple aerator maintenance. Most cartridge removal involves unscrewing or lifting the faucet handle, removing retaining clips or screws, and carefully extracting the cartridge component from its housing within the faucet body.
Once removed, inspect the cartridge for visible sediment accumulation, mineral deposits, or damage to internal components. Light debris might respond to careful cleaning with water and gentle scrubbing, but heavily clogged or damaged cartridges typically require replacement. Unlike aerators, cartridges are model-specific components, so bring your old cartridge to the hardware store to ensure you purchase the correct replacement that matches your faucet's specifications.
Installing a new cartridge reverses the removal process, but pay careful attention to proper orientation and alignment. Incorrectly installed cartridges can cause temperature control problems or continued flow issues. After installation, gradually restore water supply and test both pressure and temperature control to verify successful repair before considering the job complete.
Blocked Supply Lines Under the Sink
The supply lines connecting your kitchen faucet to the main plumbing system represent another potential source of pressure problems. These flexible or rigid lines can develop internal blockages, kinks, or damage that restricts water flow before it reaches the faucet assembly. Unlike aerator or cartridge issues, supply line problems often require more extensive repair work and careful safety considerations.
Supply line blockages typically develop over time as sediment and mineral deposits accumulate at connection points or within the lines themselves. Flexible supply lines are particularly vulnerable to kinking if they've been disturbed during cabinet organization or repairs under the sink. Additionally, very old supply lines may experience internal deterioration that progressively narrows their effective diameter, reducing the amount of water that can flow through them.
Testing whether supply lines are causing your pressure problems requires comparing flow rates at different points in the system. Start by shutting off the supply lines at the shut-off valve controls located under your sink, then disconnect the lines from the faucet. Place a bucket under the supply line ends and gradually open the shut-off valves to test water flow directly from the lines without the faucet in the equation.
If water flows strongly from the disconnected supply lines, the problem likely resides in your faucet components rather than the lines themselves. However, if flow remains weak even when testing the lines directly, you've identified the source of your pressure issues. This test helps distinguish between faucet-specific problems and supply line blockages, saving time and directing your repair efforts appropriately.
Cleaning supply line blockages sometimes succeeds if the obstruction consists of loose sediment that flushing can dislodge. However, mineral buildup or damaged lines typically require replacement. Supply line replacement involves selecting lines of appropriate length and connection type, ensuring secure connections at both the shut-off valve and faucet ends, and testing for leaks after installation to prevent water damage.
Safety considerations are paramount when working with supply lines. Always shut off water at the main valve or individual shut-off valves before disconnecting lines. Keep towels and buckets handy to manage water spillage, and inspect connection points carefully after completing repairs to ensure no leaks develop. If you discover extensive corrosion, multiple damaged components, or feel uncomfortable with the repair complexity, contact a professional plumber rather than risking water damage or personal injury.
Hidden Plumbing Leaks Reducing Pressure
Hidden leaks throughout your home's plumbing system can significantly reduce water pressure at your kitchen sink by diverting water before it reaches its intended destination. These leaks often remain concealed behind walls, under floors, or in other inaccessible locations, making them challenging to detect until they cause visible damage or manifest through secondary symptoms like unexpectedly high water bills.
Even relatively small leaks can substantially impact water pressure, particularly if they occur in supply lines close to your kitchen or in main distribution lines serving multiple fixtures. The relationship between leaks and pressure becomes more pronounced in homes with lower overall water pressure from municipal supplies, where any water loss translates directly to noticeable flow reductions at fixtures throughout the house.
Several warning signs indicate that hidden leaks might be contributing to your kitchen sink pressure problems. Damp spots on walls, ceilings, or floors near plumbing lines suggest water escaping from the pressurized system. The presence of mildew or mold in unexpected locations often indicates moisture from hidden leaks. Peeling wallpaper, bubbling paint, or warping floorboards near plumbing routes also warrant immediate investigation.
Financial indicators can reveal leaks before physical damage becomes apparent. Sudden spikes in monthly water bills without corresponding increases in usage suggest water escaping from your plumbing system somewhere. Comparing current bills to historical usage patterns helps identify unusual consumption that might indicate leaks requiring attention before they cause extensive property damage.
The water meter test provides a reliable method for confirming leak suspicions. Start by shutting off all water-using appliances and fixtures throughout your house, including your water heater, dishwasher, washing machine, and all faucets. Locate your water meter and record the current reading. Wait 30 minutes to an hour without using any water, then check the meter again. If the reading has changed despite no water usage, you have a leak somewhere in your system that needs to be located and repaired.
For leaks affecting your kitchen sink specifically, inspect the cabinet area beneath the sink thoroughly. Look for puddles, moisture on cabinet floors, water stains, or any signs of ongoing water escape. Check all visible pipe connections, supply line attachments, and valve assemblies for signs of water seepage that could be reducing pressure at your faucet.
Addressing hidden leaks typically requires professional plumbing expertise, particularly for leaks within walls or under floors. Professional plumbers possess specialized leak detection equipment, including electronic listening devices and thermal imaging cameras, that can locate leaks without destructive investigation. Attempting to find and repair hidden leaks without proper tools and experience often leads to unnecessary damage and expensive repairs that exceed the cost of professional service.
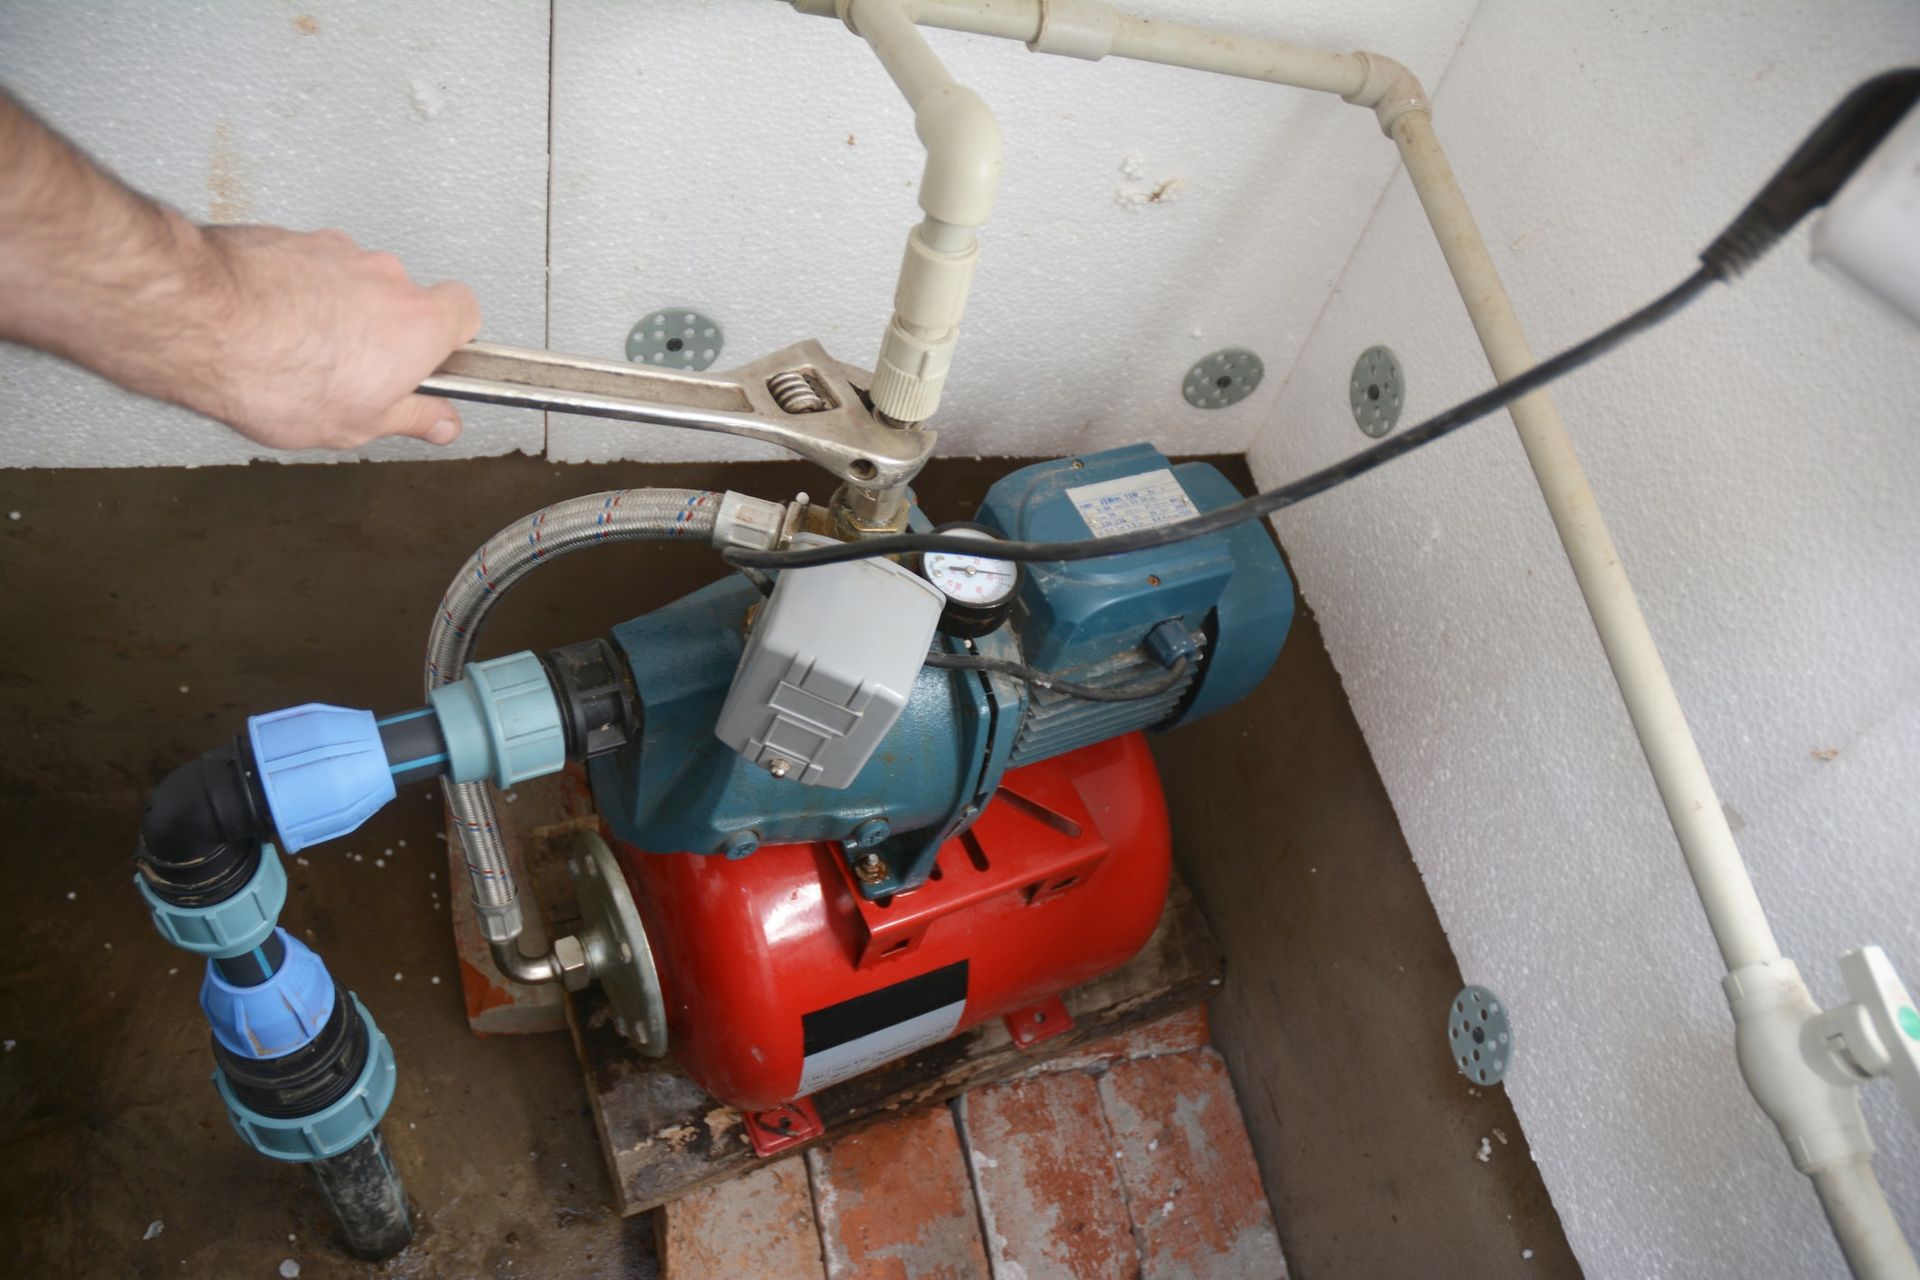
Malfunctioning Shut-Off Valves
The shut-off valves controlling water supply to your kitchen faucet play a crucial role in maintaining adequate pressure, and valve malfunctions represent a frequently overlooked cause of flow problems. These valves, typically located in the cabinet beneath your sink, must remain fully open to allow unrestricted water flow to your faucet. Even partial closure significantly reduces pressure, while internal valve damage can restrict flow even when the valve appears properly positioned.
Shut-off valve problems often develop gradually as internal components deteriorate from age, mineral deposits, or mechanical wear. Valves that haven't been operated in years may become difficult to turn or may not fully open even when rotated to their apparent maximum position. Additionally, following plumbing repairs or maintenance work, these valves sometimes remain partially closed, inadvertently causing pressure reductions that homeowners attribute to other causes.
Visual inspection provides the first step in diagnosing shut-off valve problems. Locate the valves under your sink - typically two valves controlling hot and cold water supply lines. Ensure both valves are turned fully counterclockwise to their completely open positions. If a valve resists turning or feels rough during operation, internal damage may be restricting water flow even when the valve appears fully open.
Testing valve function involves comparing water pressure before and after adjusting the valve position. With your faucet turned on, gradually close and reopen each shut-off valve while observing changes in water flow. A properly functioning valve should have minimal impact on pressure when fully open, and flow should stop completely when closed. If pressure remains low even with valves fully open, or if flow continues when valves are closed, replacement may be necessary.
Valve replacement requires shutting off water at the main supply line and disconnecting supply lines from the faulty valve. This repair involves selecting valves of appropriate size and connection type, ensuring secure installation to prevent leaks, and testing thoroughly after completion. While valve replacement represents a manageable DIY project for many homeowners, the potential for water damage if connections fail makes professional installation advisable for those uncomfortable with plumbing repairs.
Water Heater Issues Affecting Hot Water Pressure
Low hot water pressure specifically at your kitchen sink often indicates problems with your water heater rather than the faucet itself. Sediment buildup in water heater tanks, aging heating elements, or malfunctioning temperature and pressure relief valves can all contribute to reduced hot water flow throughout your home, with effects often most noticeable at frequently used fixtures like kitchen sinks.
Sediment accumulation represents the most common water heater-related cause of pressure problems. Minerals in your water supply gradually settle to the bottom of the heater tank, forming a layer that can eventually block or restrict the outlet pipe. This sediment buildup develops slowly over years, causing progressive reduction in hot water pressure that homeowners often attribute to faucet problems rather than the water heater itself.
Distinguishing between water heater and faucet problems requires testing hot water pressure at multiple fixtures throughout your home. If low hot water pressure affects your kitchen sink along with other sinks, showers, and water-using appliances, the water heater likely needs attention. However, if only your kitchen sink experiences hot water pressure problems while other fixtures maintain normal flow, focus your investigation on kitchen-specific components.
Sediment-related pressure problems sometimes respond to water heater tank flushing - a maintenance procedure that removes accumulated debris from the tank bottom. This process involves connecting a garden hose to the tank's drain valve, opening the valve to drain several gallons of water, and observing whether sediment flows out with the drained water. Multiple flush cycles may be necessary to remove substantial sediment accumulation that has built up over years.
However, water heater maintenance involves safety considerations that make professional service advisable for many homeowners. Gas water heaters require careful attention to pilot light operation and gas connections, while electric units involve high-voltage electrical components. Additionally, very old water heaters may have deteriorated to the point where flushing procedures could damage aging components or reveal other problems requiring replacement.
Signs that your water heater may need professional attention include inconsistent hot water temperatures, unusual noises during heating cycles, visible corrosion or mineral deposits around connections, or age exceeding the manufacturer's recommended service life. Most residential water heaters last 8-12 years, and units approaching this age range often develop multiple problems simultaneously that make replacement more economical than repair.
Municipal Water Supply Problems
Not all low kitchen sink water pressure originates within your home's plumbing system. Municipal water supply fluctuations, infrastructure problems, or maintenance activities can temporarily or permanently affect pressure throughout entire neighborhoods or service areas. Distinguishing between home plumbing problems and municipal supply issues prevents unnecessary repairs and helps set appropriate expectations for resolution.
Municipal supply problems typically affect multiple homes simultaneously rather than just individual properties. When municipal infrastructure experiences difficulties, neighbors throughout the service area usually report similar pressure reductions. This widespread impact distinguishes municipal issues from home-specific problems like clogged aerators or faulty cartridges that affect only individual properties.
Several factors can cause municipal supply pressure problems. Maintenance work on water mains or treatment facilities often requires temporary pressure reductions or service interruptions. High demand periods, such as during drought conditions when landscape irrigation increases dramatically, can strain supply systems beyond their capacity. Infrastructure failures, aging pipes in municipal distribution systems, or problems at water treatment plants can also reduce pressure delivered to homes.
Verifying whether municipal supply issues are causing your kitchen sink pressure problems requires checking with neighbors and contacting local water authorities. Start by asking nearby neighbors whether they're experiencing similar pressure reductions. If multiple households report pressure problems, municipal supply issues are likely responsible rather than problems within your individual plumbing system.
Contact your local water utility or municipality to inquire about known service issues, scheduled maintenance work, or infrastructure problems affecting your area. Water authorities typically maintain customer service lines for reporting problems and can provide information about expected resolution timeframes for known issues, helping you decide whether to pursue home-based troubleshooting or simply wait for municipal repairs.
Step-by-Step Diagnostic Process
Effective troubleshooting of low kitchen sink water pressure requires a systematic diagnostic approach that identifies the specific cause before attempting repairs. This methodical process prevents wasted time on unnecessary fixes and ensures you address the actual source of your pressure problems rather than treating symptoms that may resolve temporarily but recur.
Begin your diagnosis by testing water pressure at multiple fixtures throughout your home. Turn on all sinks, showers, and other water outlets to determine whether low pressure affects only your kitchen sink or represents a widespread issue. If other fixtures maintain normal pressure while only your kitchen sink struggles, focus your investigation on kitchen-specific components like the aerator, cartridge, and supply lines.
However, if pressure appears low throughout your home, the problem likely involves your plumbing system broadly - potentially the main shut-off valve, pressure-reducing valve, widespread leaks, or municipal supply issues. This distinction guides your subsequent troubleshooting efforts and helps determine whether DIY solutions might suffice or professional plumbing services are necessary.
For kitchen-specific pressure problems, start with the simplest and most common causes. Remove and inspect the aerator first, as clogged aerators account for the majority of localized pressure issues. Clean the aerator thoroughly using the vinegar overnight soaking method if mineral deposits appear significant. Reinstall the aerator and test whether pressure has been restored to normal levels.
If aerator cleaning fails to improve flow, proceed to inspect the faucet cartridge. This requires partially disassembling your faucet, so consult manufacturer instructions or faucet documentation to understand the proper disassembly sequence. Remove, inspect, and clean or replace the cartridge as needed, paying careful attention to proper installation orientation to ensure the faucet functions correctly.
Next, examine supply lines and shut-off valves under your sink. Verify that shut-off valves are fully open and test their operation. Inspect supply lines for obvious damage, kinks, or blockages. If these components appear intact, test supply line flow by disconnecting them from the faucet and observing water flow directly from the lines.
When to Contact Professional Plumbers
While many kitchen sink pressure problems respond well to DIY diagnosis and repair, certain situations require professional plumbing expertise to ensure safe and effective resolution. Understanding when to attempt repairs yourself versus calling professionals helps prevent water damage, personal injury, and expensive mistakes that could complicate simple problems into major issues.
Contact professional plumbers immediately if you discover active leaks during your diagnostic process, particularly leaks involving gas lines, main water supplies, or areas where water could damage electrical systems. Leak repairs often require specialized tools and expertise to prevent escalation into major water damage situations that could affect your home's structure and safety.
Complex cartridge problems, particularly in newer faucets under warranty, often warrant professional attention. Some high-end faucets have intricate cartridge mechanisms that require specific tools and techniques for proper service. Additionally, warranty coverage may be voided if unauthorized repairs are attempted, making professional service the most cost-effective option in the long run.
Water heater-related pressure problems generally require professional intervention due to safety considerations. Gas water heaters involve combustion systems and gas connections that pose serious safety risks if handled improperly. Electric water heaters contain high-voltage components that can cause electrocution if accessed without proper precautions. Professional technicians have the training and equipment necessary to service these systems safely.
Extensive supply line problems, particularly those involving pipes within walls or under floors, require professional diagnosis and repair. Professional plumbers possess specialized leak detection equipment that can locate problems without destructive investigation. They also have access to professional-grade repair materials and techniques that provide lasting solutions you can depend on.
If your diagnostic efforts fail to identify the cause of your pressure problems, or if simple repairs don't restore adequate flow, professional evaluation can save time and prevent frustration. Experienced plumbers can quickly identify unusual problems that might elude homeowners and recommend appropriate solutions based on your specific plumbing system configuration.
Restore Your Kitchen Sink Pressure Today
Water pressure issues in kitchen sinks typically stem from identifiable causes that homeowners can systematically diagnose and often resolve. Starting with simple solutions like aerator cleaning and progressing through more complex possibilities like cartridge problems or supply line issues provides an effective troubleshooting framework. Remember that proper diagnosis prevents unnecessary repairs and ensures you address the actual source of your pressure problems.
At Wragg Brothers, we understand how frustrating low water pressure can be in your kitchen. Our experienced team has been solving plumbing problems throughout New Hampshire, Vermont, and Massachusetts for over 65 years. Whether you need professional diagnosis, expert repairs, or advice on maintaining your plumbing system, we're here to help restore strong, reliable water flow to your kitchen sink.
Don't let low water pressure continue disrupting your daily routine. Contact Wragg Brothers today for professional plumbing services that deliver lasting results. Our certified technicians can quickly diagnose pressure problems, perform necessary repairs, and provide guidance on preventing future issues. When in doubt about any plumbing repair, don't hesitate to consult with our professional team who can provide expert guidance and ensure lasting solutions to restore strong, reliable water flow to your kitchen sink.